When I think about it, I think my preferred style of cooking might very well be “looks harder to make than it is”. Most of the things I prepare are simply the result of having a kitchen stocked with some good fridge / pantry / freezer staples + whatever inexpensive seasonal produce I can find at the grocery store (or, if I’m lucky, farmers’ market) that week. The main rules are: 1) Do your best not to waste, 2) Try to eat a variety of foods, and 3) Cook most of your meals. It’s out of these constraints that my creativity has blossomed — and so far I have not been disappointed.

One way to get nice variety on your plate is to think of Greens, Grains and Beans (I take no credit for this catchy mnemonic!) and go from there. And on a day where my culinary inspiration was running low, remembering that little expression is what lead to the creation of a seriously incredible dinner for two.
cooking the grains
- Pick any whole grains you have and like. One trick to shake things up is to combine different grains that have similar cooking times. I used emmer, spelt and tri-colour rice.
- Lightly toast them on medium-high heat – dry or with your fat of choice – in a saucepan that comes with a lid. After 2-3 minutes (or as soon as you start smelling their nutty aroma), add a liquid. I used vegetable broth this time, but you could use water, another kind of broth, or some combination of the two (feeling extra fancy? throw in a generous splash of wine or beer). In terms of quantities, it ended up being 1 part grains for 2.5 parts liquid for me.
- Bring the liquid to a boil, put the lid on and reduce the heat to medium-low until your timer is up. Then let steam in the pot for another ten minutes, off the heat. For me, this meant 50 minutes of cooking + 10 of steaming.
cooking the beans
- First things first, you can use beans from a box or a can. I keep dried beans in my cupboard, so cook them from scratch. This time, I opted to prepare white beans and chickpeas together as they have similar cooking times. To do so, I soaked about a fistful of each in just-boiled water for 1 hour (ideally, you would soak them in cold water the night before for about 8 hours). I then drained and rinsed them, put them in a pot, covered generously with fresh water, and added a pinch of salt, black pepper and a bay leaf. Once that water was boiling, I put a lid on the pot and let the beans simmer for 45-50 minutes.
- Optional. Put your cooked beans in a frying pan with as much or as little garlic as you like (fresh and thinly sliced, or dry and powdered – use what you’ve got!) and the fat of your choice. I used olive oil. Turn the heat up to medium and let everything sizzle for 10-15 minutes, stirring occasionally, until the garlic is lovely and fragrant. Season lightly with salt and black pepper (or salt and chili flakes).
cooking the greens
- “Greens” might as well be a catch-all term for vegetables here, because I essentially raided my refrigerator’s produce drawer. Had that drawer been empty, I would have turned to my freezer (where I always have green peas and a lapskaus mix of potato, carrot and leek, at the very least; I hope you have your freezer favourites too). Use whatever you like and have on hand, and turn on your oven to a high heat (210C fan / 230C / 450F): we are going to roast some flavour into them*.
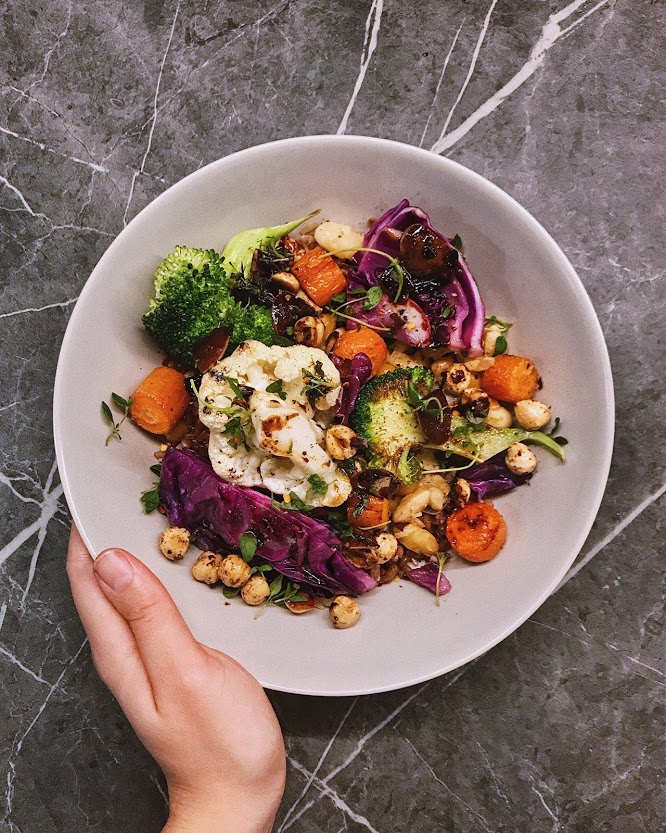
- Cut your vegetables any which way you like, as long as all the pieces are of a similar size – with quicker-cooking veg in larger pieces, and slower-cooking veg in smaller pieces. Here, I find the combination of cauliflower, broccoli, carrot and cabbage work really well.
- Toss in an oven-safe dish with a bit of your favourite unrefined fat, season with salt and pepper, and add on any other spices and seasonings you enjoy. Roast for 15-25 minutes, keeping an eye on them once 15 minutes have passed. Once they look good, take them out.
*you can of course cook them any way you like! steaming and sautéeing would also be welcome here – just make sure to keep the colours vibrant by not cooking them for too long
bonus: cooking the sauce
Maybe the phrase should be Greens, Grains, Sauce & Beans because I think the addition of a warm vinaigrette really takes this meal to the next level.
- Optional. In a dry frying pan, toast a small handful of the nut or seed or your choice. I went with hazelnuts that I cut in half, but pumpkin seeds would probably have been great here. Use a medium heat, and don’t walk away from the pan – all you need is a few minutes.
- Make a hot dressing** with 3 parts olive oil, 1 part balsamic vinegar, 1 part soy sauce, ¼ parts garlic (fresh or dried), thyme (fresh or dried), chili flakes and black pepper. Basically you just want to heat things through and let the flavours infuse a bit. This won’t take much more than 5 minutes.
**use this template to customize your own warm vinaigrette ↠ heat 6 Tbsp oil + 2 tsp dried spice + 1 Tbsp allium (like garlic or shallot) over medium heat until fragrant, 2 mins. remove from heat, then whisk in 2 Tbsp acid (think vinegar or lemon juice), 2 Tbsp of another acid or liquid condiment (like mustard or soy sauce), an optional 2 tsp sweetener (like honey or dried fruit), and season with salt and pepper.
The last thing to do is assemble: grab a deep dish or a bowl and layer in your cooked grains, beans, greens and sauce. Finish with an extra sprinkling of herbs, chili flakes and black pepper and you’re done! I promise you will knock your own socks right off.
Remember when I said my style might look more complicated than it is? Case in point: this dish seems like it’s asking a lot of whoever dares attempt to cook it. Yet, truth be told, everything can be prepared more or less at the same time, and most of the cooking happens by itself. All you’re doing is essentially putting grains in a pot, beans in another pot, and vegetables in the oven. Easier than it all appears at first glance, and very much worth the small effort.
Are you more a visual learner? Watch me cook this dish here.


